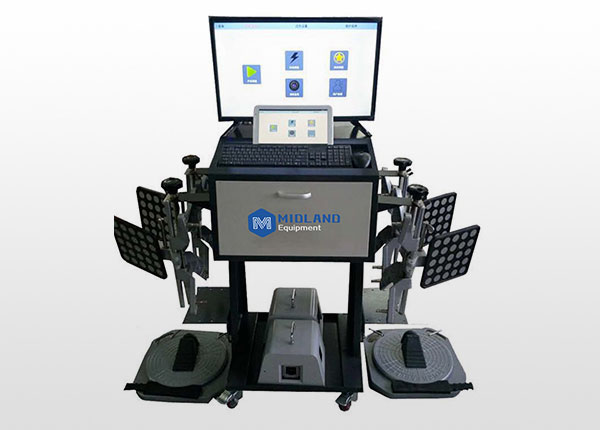
Product features
Higher accuracy more powerful function Accuracycan be accurateto0.1mm/0.01°
Wide measurement range,in addition to all the traditional parameters can be achieved and can be measured wheel bias,wheel devation and other distance parameters,easy to complete the function ofordinary psditioninginstrumentcan not do. Concenient operation
Measurement is not affected by the level of the platform,the body tilt tis accuracy is not affected;
All parameters can be measured only by pushing the car or rolling wheel;
Install target board vehcle rolling compensation,virtual measurement fast measuring speed;
There is no moving parts ,no need to maintain the work ,the target board need ta
maintain the work,the target board needs no calibration no electronic components on wheels.
THE failure very low
The target reflector without electronic components,no battery, no data transmission only the role of image reflection:
The theme of the bracket for the metal stent,beams mostly casting,corrosion resistance to strong;
Five high-precision digital cameras continuously monitor the target board on each wheel Can choose refrence piane
Real-time referenceplane:Target as a reference plane;
Fixedreference plane:Take thelift plane as the reference plane Easy to use
MEASUREMENT RANGE AND PRECISION
| Measurement project | Measuring accuracy | Measuring range |
| Camber | ±0.01° | ±8° |
| Caster angle | ±0.03° | ±19° |
| Front wheel angle | ±0.02° | ±19° |
| Toe-in | ±0.01° | ±2° |
| Rear wheel propulsion angle | ±0.02° | ±2° |
| Rear axle offset | ±0.02° | ±2° |
| Track difference | ±0.02° | ±2° |
| Anterior withdrawal angle | ±0.02° | ±2° |
| Receding angle | ±0.02° | ±2° |
| Ttead | ±0.64cm | ±<265cm |
| Wheelbase | ±0.64cm | ±<533cm |
| Packing size | 860*620*1220 | |
PREV:Wheel Alignment 07
NEXT:Wheel Alignment 05